FITT RAIN G80

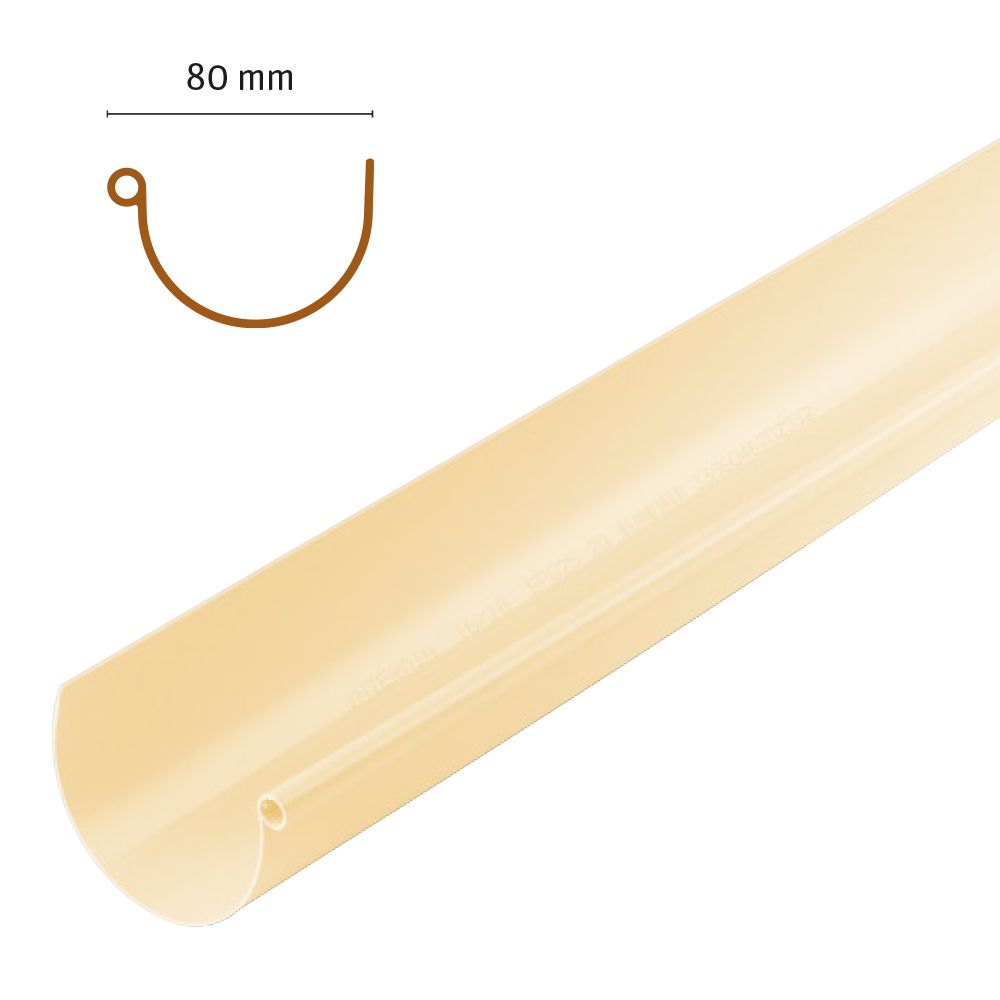
FITT’s G80 rainwater system is complete, easy adaptable to any garden shelter dimension and user friendly to be assembled. Setting is possible both by gluing and by means of gaskets. The gasket, made of EPDM, guarantees longer tightness and duration, lengthening the time between each replacement.


FITT Rain System G80 Colors

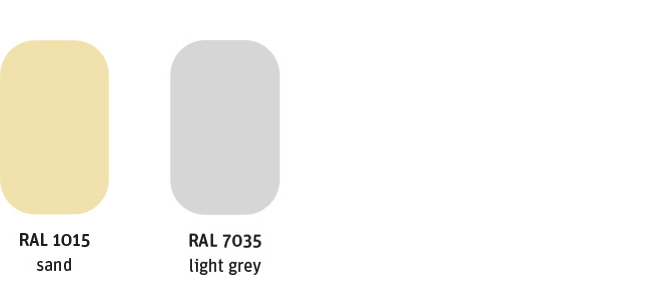
Colors do not exactly coincide with RAL System, but an attempt has been made to reproduce the most similar colors
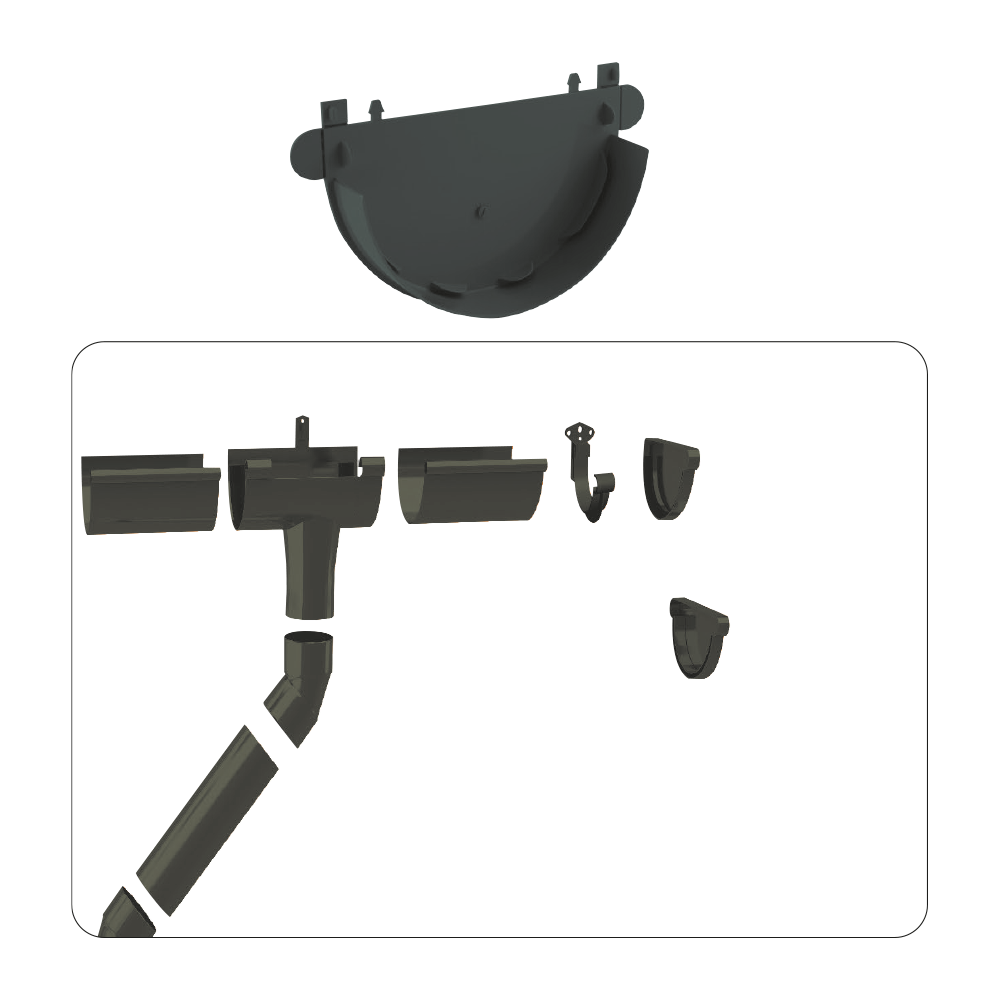
FITT RAIN G80

FITT RAIN G80 SYSTEM PLUS

FITTING SYSTEMS

FITT Rain is complete, easy adaptable to buildings of every size and user-friendly: assembly is possible both by gluing and by means of gaskets, allowing effortless jointing.

The compressible EPDM gaskets guarantee longer tightness and duration. This system results in flexible, watertight and leak proof-joint.

UNIVERSAL STOP END


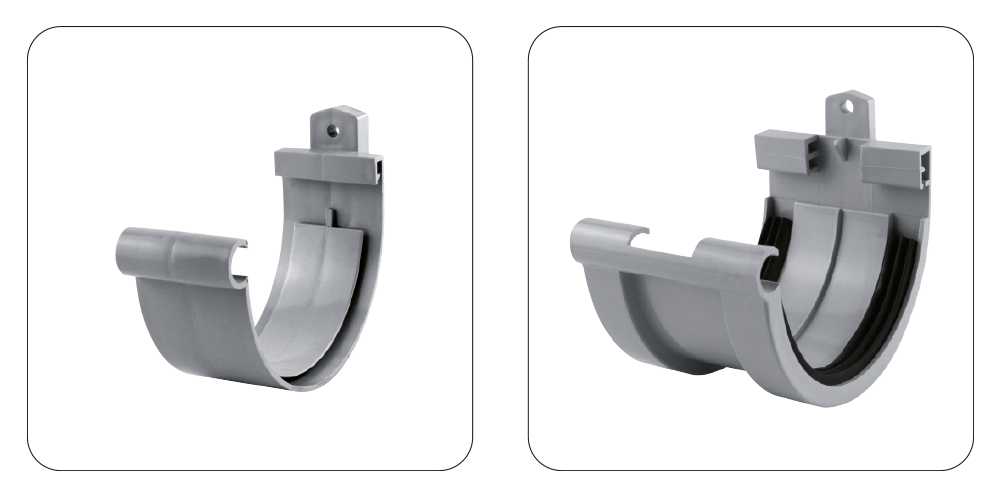
FITT Rain offers an innovative universal stop end, adaptable both for the left and right side of the gutter and suitable also for outlet (glued system).

UNIVERSAL STOP END
1
Attach the support brackets, while descending 3 mm in the direction of the drain-pipes.
2
It is necessary to connect the highest and the lowest support brackets with a string, thanks to which it will be possible to place the remaining support brackets at the correct height. PVC hooks should be assembled max. every 40 cm.
3
Saw the gutters with a hacksaw to the necessary lenght.
4
Place the gutters on the support brackets. Then click the gutter in the support brackets.
5
Elements such as the central drain funnel, left hopper, right funnel and connector have their own additional mounting, thanks to which the system is stable. With these elements hooks should be mounted at a distance of not more than 15 cm.
6
If the downpipe is provided at the end of the building, we can use a left or right drain funnel with an integral bottom. Install the connectors and the outlets while descending 3 mm.
7
Connect the gutter sections using connectors. The length of individual sections of gutters between elements is trimmed so that the ends of the gutters reach the dotted line marked on the connector as "limit position".
8
At the ends of the gutters, install the bottom using PVC glue. Fittings with rubber joint does not require the use of glue.
9
In the case of a roof with eaves, the connection of a drainpipe with a downpipe should be made using knees of 45˚or 67˚and cut to the appropriate length of the drain pipe.
10
Install the corners on the gutter. It is necessary to jam the corner on the gutter on one side and then on the other. The distance between the support brackets and the edge of the corners should not exceed 15 cm.
11
Attach the fixo clamps to the wall. Depending on your needs, use screws with a length of 7, 14 or 22 cm. The clamps in the downpipes are mounted approx. 2 m away.
12
Place the drain tube in the clamps. The drain pipes are finished with a chalice allowing them to be joined together without the use of a sleeve. Leave approx. 5 mm clearance in the connection between the pipes.
13
Depending on the needs, mount the tee, mounting it to the wall with the help of fixo clamps. Provide approx. 5 mm clearance.
14
Install the elbow as the outlet of the downpipe. The minimum distance of the knee from the ground should be 20 cm.